The cross-control stall has a deadly reputation, and for good reason. The AOPA’s Safety Institute researched various stall accidents and found that in nearly 80% of cross-control stall accidents, at least one person aboard the aircraft died. Those aren’t the kind of odds most of us would like to gamble on, so clearly some training and prevention is in order.
Now unless you are pursuing your CFI certification, you won’t actually be doing hands-on training for this type of stall. Still, we all know that just because we haven’t practiced a scenario, that doesn’t mean that it won’t happen us. In fact, nearly half of all stall accidents occur with private pilots at the controls.
That’s why private pilots receive ground school training that addresses how to avoid getting into a cross-control stall in the first place. Private pilots’ CFIs will also demo a cross-control stall and the recovery procedure so students can gain a real-world understanding of this type of stall.
Although they won’t ask prospective pilots to physically perform the maneuver during the check ride, the DPE may ask the student to talk them through how a cross-control stall occurs, how to avoid it, and how to recover from it.
Bottom line: It is always in our best interest to be alert to potentially dangerous situations plus know what to do if we find ourselves playing out that worst-case scenario, and a cross-control stall definitely qualifies as one of those worst-case scenarios.

What is a cross-control stall?
A cross-control stall is a stall that occurs when the critical angle of attack (AoA) is exceeded while in a skidding or slipping turn induced by aileron pressure in one direction and rudder pressure in the opposite direction (hence the name cross-control). In a cross-control stall, one wing stalls before the other, causing the aircraft to rotate as the nose drops. Check out some onboard footage of a cross control stall and notice the aircraft behavior as one wing stalls. As you can see, this type of stall has the potential to easily turn into a spin if not quickly corrected.
What causes a cross-control stall?
A cross-control stall is caused by a series of uncoordinated and reactive control inputs. Just prior to the onset of a standard cross-control stall, the pilot initiates a turn using excessive bottom rudder – that is rudder on the side in the direction of the turn. For example, if you are making a right turn, the right rudder would be the bottom rudder. This excessive application of bottom rudder while maintaining bank angle sets up a skidding turn scenario.
In a skidding turn, the lower wing is flying at a higher angle of attack thanks to the application of the excessive rudder on that side. In contrast, the opposite high wing experiences greater relative airspeed and generates increased lift. This means that the lower wing will now stall at a faster airspeed than the higher wing.
The cross-control stall occurs when the pilot applies opposite aileron input while maintaining the initial rudder input on the lower wing and adding excessive back elevator pressure to keep the nose up. The aircraft rolls further towards the lower wing side, increasing the bank angle and eventually the critical angle of attack is exceeded on the lower wing. This wing then stalls.
If both wings were to stall at the same time, the nose of the aircraft would simply dip, however in a cross-control stall, since the lower wing stalls first, this causes the aircraft to rotate towards that lower wing as the nose simultaneously dips. If the wings rotate past vertical, you may enter a stall-spin scenario.
To further develop your understanding of the aerodynamics of a cross-control stall, take 5 minutes to study CFI Gene Benson’s animated explanation of a Deadly Turn – Base Leg to Final Approach.
(the 3D "Plane"is by osmosikum is licensed under Creative Commons Attribution.)
When do most cross-control stalls occur?
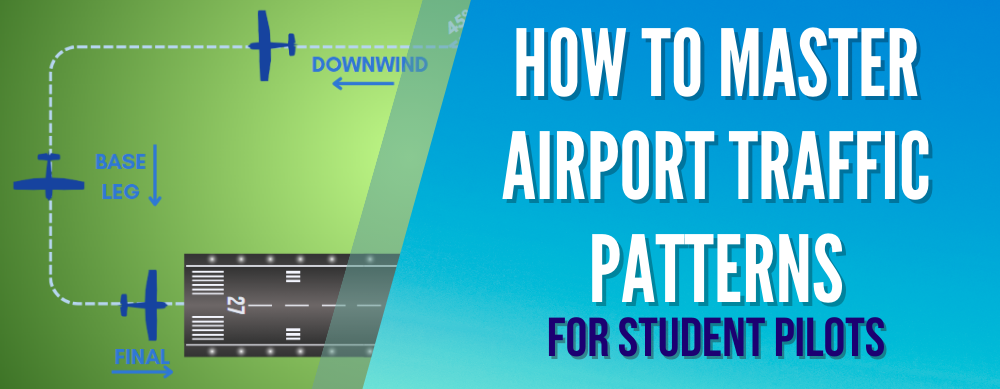
A cross-control stall can occur any time when you are making a banked turn while inputting opposite aileron and rudder pressure, but you should be especially vigilant and cognizant of your actions and control inputs as you are making your base-to-final approach turn. This is when most cross-control stalls occur.
Why is that? Let’s paint the picture. Imagine flying your approach, and as you make your base-to-final turn, you quickly realize that you did not properly correct for a crosswind on the downwind leg. The base leg tailwind then caused you to overrun your course, shifting your position so that as you make your turn to final, you are not lined up with the runway. What do you do?
During the most common cross-control stalls, the pilot overshoots the runway centerline during the base-to-final turn. In an attempt to compensate and correct, rather than increasing the rate of turn through coordinated aileron and rudder inputs, the pilot applies excessive rudder towards the runway to increase the rate of turn while attempting to maintain the original bank angle. This increased and excessive rudder pressure initiates the skidding turn that is the hallmark lead-in to a cross-control stall.
The AOPA Air Safety Institute notes that some of the most common factors that contribute to this type of stall are distraction as well as rapid increases in bank angle and back pressure at low speeds. There’s a need, they say, for “more realistic stall training that emphasizes how quickly angle of attack increases with added bank and G-forces.” They also advocate raising “awareness of the dangers of distraction.”
The danger of a cross-control stall on base-to-final is that it can creep up on us without us realizing the danger. While we are focused on and distracted by the runway and radio traffic, we may not immediately recognize an increasing bank angle and corresponding angle of attack on our lower wing.
When we do realize that there is a problem, if we haven’t trained for how to correct it, we may actually do more harm than good. That’s why it is important to not only know what a cross-control stall looks like and what causes it, but also how to avoid it and if possible, recover quickly with minimal altitude loss.
How to recover from a cross-control stall
When pilots enter the skidding turn that precedes a cross-control stall, as the aircraft rolls towards the low-wing side, their first response may be to make a correction for overbanking and apply the opposite aileron while raising the nose using elevator. Unfortunately, these cross-control actions if carried out actually worsen the situation and can precipitate the cross-control stall and potentially a deadly spin.
To correct the first signs of a cross-control stall, a pilot must instead:
- Reduce the angle of attack by applying opposite rudder and forward elevator to negate the rotation and return to straight and level flight.
- Apply full power.
- Use coordinated aileron and rudder to level wings and prevent a spin.
- Adjust pitch to Vy attitude and minimize altitude loss.
If the plane enters a spin before recovery can be made, use NASA’s PARE technique to break the spin:
- P: Power to Idle
- A: Ailerons Neutral
- R: Rudder Opposite Spin
- E: Elevator Forward
After completing the PARE checklist, your plane will naturally fly out of the spin. At that point, bring the rudder back to neutral, raise the nose, and slowly add power to return to level flight conditions.
How to prevent a cross-control stall
Because of the nature of a cross-control stall, it often occurs at low altitudes just before landing, and the harsh reality is that recovery prior to ground impact may not be possible. This makes it abundantly important to avoid getting into a cross-control stall in the first place.
The good news is that since human error is often to blame for initiating these stalls, you also have the power to avoid most of them.
How? For starters, practice, practice, practice. We know that the base to final turn is the single most dangerous part of your flight in terms of cross-control stall potential. That means that you should train and drill that turn over and over.
Practice lining up correctly with the runway and avoiding overshooting it no matter the conditions. Put your own personal maximum acceptable bank angle in place so you aren’t tempted to try to correct an overshoot by dangerously increasing the bank angle. Set a limit and stick to it.
In their Stall and Spin Accidents: Keep the Wings Flying publication, the AOPA Air Safety Institute recommends a 30-degree maximum. They admonish us,
“Don’t attempt to salvage an unstable landing approach, and don’t attempt to correct for an overshoot with inside rudder. If normal, coordinated maneuvering at a maximum 30 degrees of bank won’t re-establish the airplane on a stable approach no less than 500 feet agl, go around!”
Final thoughts and take-aways
With an 80% fatality rate, cross-control stalls, unfortunately, are indeed as deadly as their reputation lets on. The best way to combat them and to avoid ever experiencing one is to understand their causes and to practice making our maneuvers in a coordinated manner that doesn’t trigger a cross-control stall.
Situational awareness and continuing to always fly the airplane is crucial here. We can’t afford to get so distracted by the ground and our attempts to line up with the runway that we lose touch with what our aircraft is doing.
Remember: altitude is safety, and when you are making your base-to-final turn, you do not have the altitude to recover from a cross-control stall/spin. That means that the best way to keep yourself and your passengers safe is to fly intelligently, make good decisions, and not be afraid to execute a go-around if something is off. After all, it is better to live to tell about it than to die trying to salvage that approach.

|
Pilot's Handbook of Aeronautical KnowledgeProviding basic knowledge essential for all pilots, from beginning students through to the advanced certificates, this Federal Aviation Administration (FAA) publication introduces readers to the broad spectrum of knowledge required as they progress through pilot training. |
Want to learn more about stalls?
Check out these guides to help you get on your way to becoming a more proficient pilot!
Did you find this article helpful?
Do you think we missed anything important? Let us know in the comments below!


