Ground Reference Maneuvers: How to Ace Your Checkride
Featured Pilot Gear
Browse our selection of high-quality pilot supplies! Your purchase directly supports our small business and helps us continue sharing valuable aviation content.
One of the final steps in become a full-fledged pilot is to pass your checkride. To do that, among other things, you need to nail your ground reference maneuvers.
These maneuvers are for more than just student pilots though. No matter how long we’ve held a pilot certificate, going back to the basics has value.
We’re going to review how to fly each ground reference maneuver on the private pilot checkride (plus a bonus one that only commercial pilot and CFI candidates are tested on).
We will also recap the aircraft handling skills each move helps us to build and improve then warn about the most common errors pilots make.
Stay with us till the end when we share our top two secrets to acing all these maneuvers.
First, let’s get started with the “why.”
Table of Contents
 Why do we practice ground reference maneuvers?
Other than the obvious answer of passing our checkride, what is the greater purpose of ground reference maneuvers and why are they on the test in the first place?
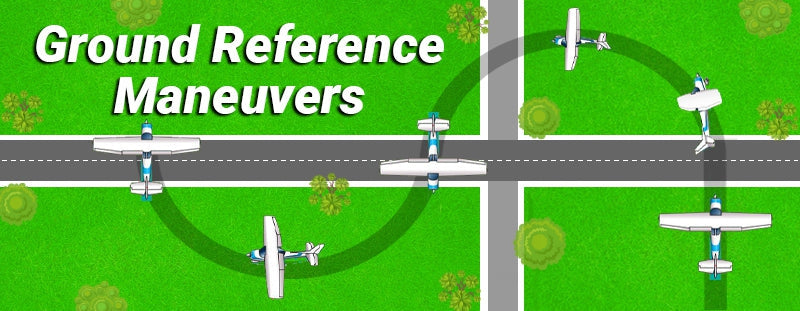
The purpose of ground reference maneuvers is to learn how to accurately maintain our aircraft position and ground track in relation to chosen ground-based reference points. This means understanding the effects of wind and wind drift.
The FAA’s Ground Reference Maneuvers publication highlights some of the practical reasons that ground reference maneuvers are part of the greater list of aircraft handling skills all pilots need to learn.
Ground reference maneuvers help us:
- Understand the relationship between our flight control pressure inputs and the aircraft’s resulting attitude.
- Develop a greater finesse in feeling and handling pitch, roll, and yaw.
- Develop coordination, timing, and attention.
- Learn to place aircraft in proper attitude and power configuration for given situations.
- Practice flying flightpaths relative to points on the surface. (This skill is the basis for flying traffic patterns, aerial surveys, aerial photography, sightseeing, crop dusting, and more including some low hour pilot jobs that are a great fit for new pilots.)
The FAA also points out that “ground reference maneuvers are the principal flight maneuvers that combine the four fundamentals (straight-and-level, turns, climbs, descents) into a set of integrated skills that the pilot uses in their everyday flight activity…From every takeoff to every landing, a pilot exercises these skills in controlling the airplane.”
So, what do you think? Are you convinced there’s more to it than just passing the test and that you are in fact learning and continuing to practice these skills for a reason?
Good. Let’s jump right into the maneuvers.
3 Ground Reference Maneuvers on Your Private Pilot Checkride
The private pilot ground reference maneuvers you will need to master and perform for your checkride are:
- Rectangular Courses
- Turns Around a Point
- S-Turns
 Rectangular Courses
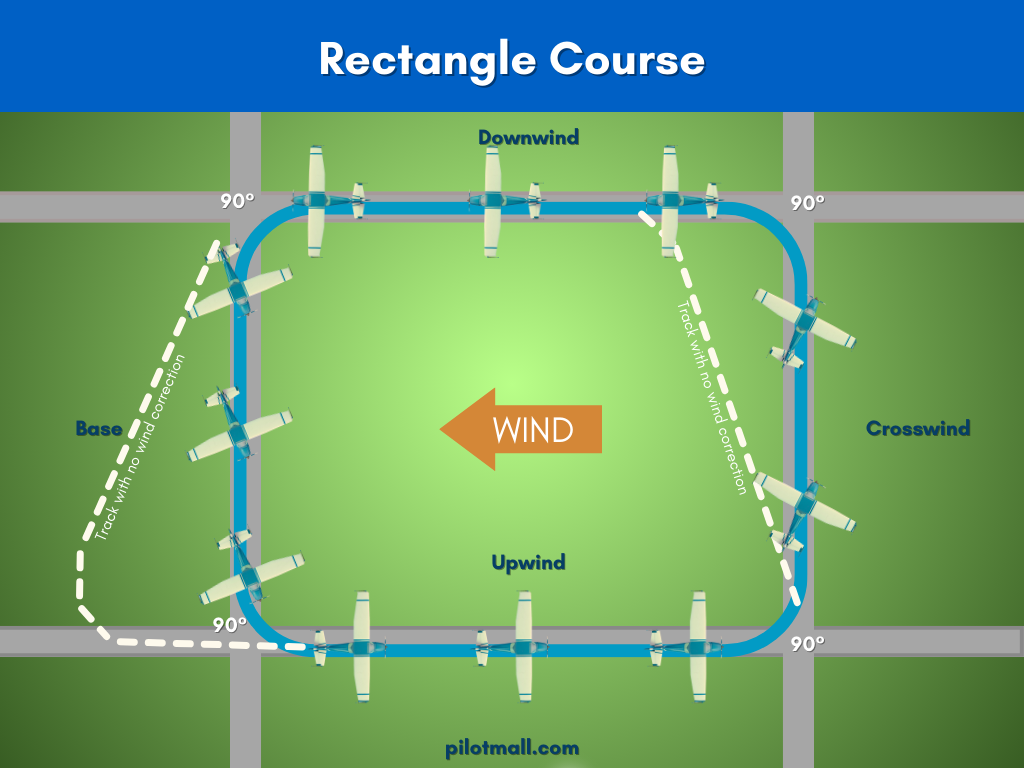
Rectangular course maneuvers are one of the first flight maneuvers student pilots learn. In a rectangular course, pilots fly two sets of parallel lines to form a box shape. This maneuver simulates flying a traffic pattern.
How to Fly Rectangular Courses
- Choose an appropriate course and altitude.
- Clear the airspace.
- Enter the maneuver at a 45-degree angle to downwind. Little to no wind correction angle will be needed for this leg.
- As you turn from downwind to base, roll into a steeper bank angle. Gradually reduce the angle as you come out of the turn.
- Turn the nose of the plane into the wind to compensate for drift as you fly your base leg. This makes your downwind to base turn greater than 90-degrees.
- The turn from base to upwind puts the wind almost directly on your nose. Roll into a medium bank turn and gradually reduce the angle as you come out of the turn into your upwind leg. As with the downwind, the upwind leg will require little to no drift compensation.
- Your upwind to crosswind turn requires the shallowest bank. The plane will want to drift toward the center of the rectangular course as you turn crosswind, so angle the nose out into the wind to compensate. This will make your turn less than 90-degrees.
- The final turn back to downwind is another medium bank turn. Since your aircraft nose is angled out of the course during the crosswind leg, the turn to downwind will be more than 90-degrees.
Skills Gained
- Timing a turn so it is fully established at a set point over the ground
- Timing turn recovery rollout to maintain established ground track and compensate for any drift caused by wind
- Determining appropriate wind compensation angle to stay on ground track through all legs of the course
Common Errors to Avoid
- Overshooting the turn
- Not entering the maneuver in a neutral attitude
- Skidding and slipping turns
- Jerky control inputs
- Undercompensating for wind, resulting in an irregular, non-rectangular flight path
Turns Around a Point
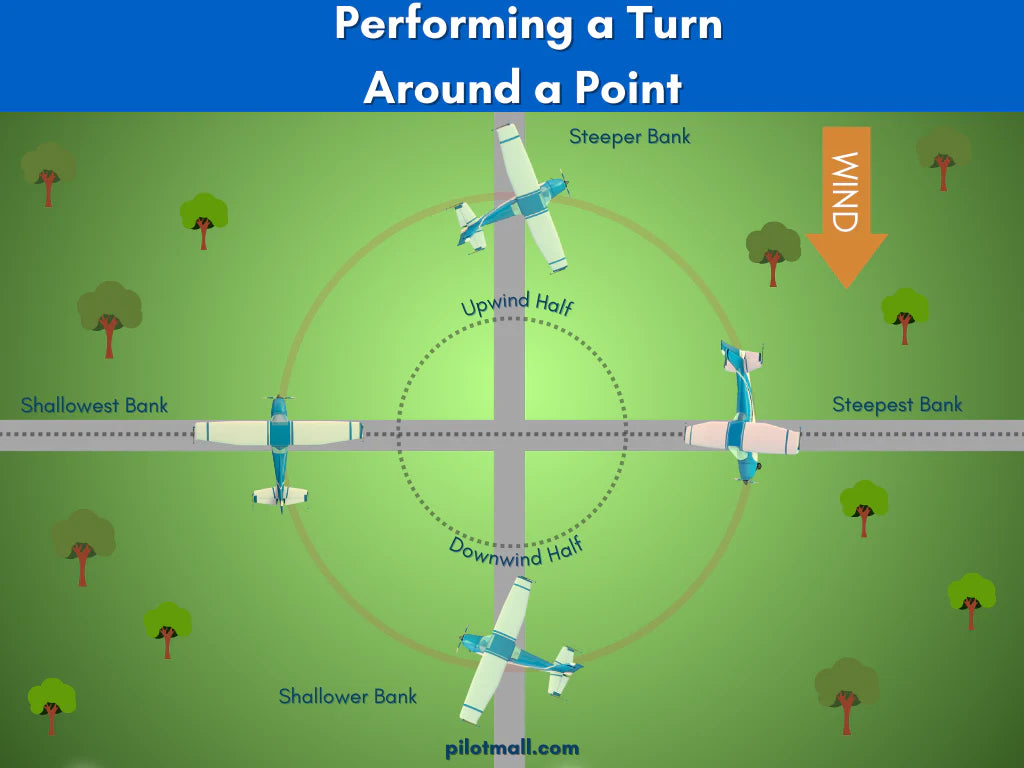
During Turns Around a Point, the goal is to fly a constant radius turn so your flight path makes a perfect circle around your chosen ground-based reference point.
How to Fly Turns Around a Point
- Choose your altitude and a small, well-defined reference point to circle.
- Clear the airspace.
- Enter your turn from the downwind side of the maneuver.
- To keep a constant turn radius, you need to adjust your bank angle to offset the effects of the wind.
- The steepest bank will be as you enter the downwind half of the circle.
- Shallow out as you begin to turn into the wind.
- Your shallowest bank is as you enter the upwind half of the circle.
- Steepen your turn again as you approach downwind.
Check out Fly8MA’s turns around a point tutorial for good visuals and a full run down of the maneuver.
Skills Gained
- Ability to maintain a specific relative relationship between the plane and ground
- Visual scanning between ground reference point, flight path, and instrument panel
- Ability to quickly change bank angle
- Ability to compensate for drift
- Understanding of the correlation between the bank angle and the radius of the turn
Common Errors to Avoid
- Drifting off the flight path due to improper bank angle adjustments
- Fluctuating altitude
- Visually fixating on the reference point instead of scanning between the point, flight path, and instruments
 S-Turns
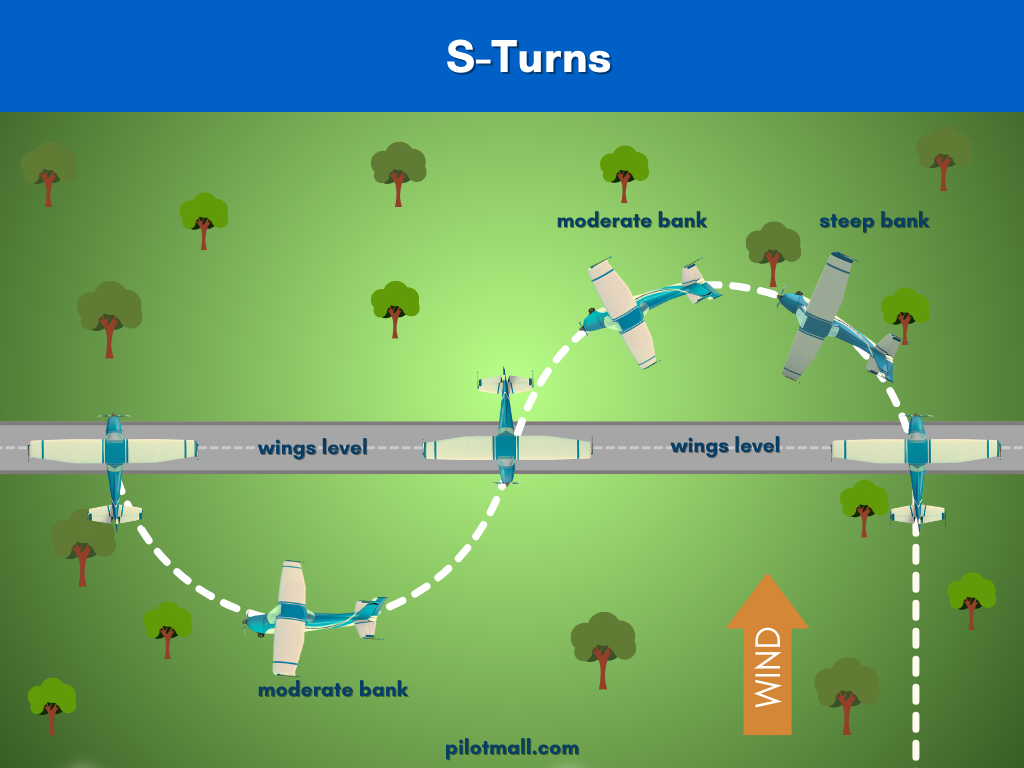
S-Turns are like turns around a point, but as you fly an s-shaped flight path over a straight-line reference point, you will make a half circle in a left bank and the other half in a right bank.
How to Fly S-Turns
- Choose your altitude and a straight-line reference point.
- Clear the airspace.
- As with turns around a point, begin the maneuver downwind.
- To make each half circle even and equal, you need to continuously adjust your bank depending on your position relative to the wind.
- The steepest bank will be when you are downwind both as you enter your initial turn and just before you level out from your final turn.
Fly8MA has a good S-turn tutorial that illustrates the maneuver and the relative bank angles throughout.
Pro Tip: The secret to acing this maneuver is to remember that your wings should be level each time you cross your straight-line reference point. Also, choose a reference point perpendicular to the wind as this makes the maneuver easier.
Skills Gained
- Ability to maintain a specific relative relationship between the plane and the ground
- Visual scanning between the ground reference point, your flight path, and the instrument panel
Common Errors to Avoid
- Not being straight and level at the start of the maneuver
- Losing or gaining altitude during the maneuver
- Slipping turns due to uncoordinated control inputs
 What Altitude are Ground Reference Maneuvers Usually Flown At?
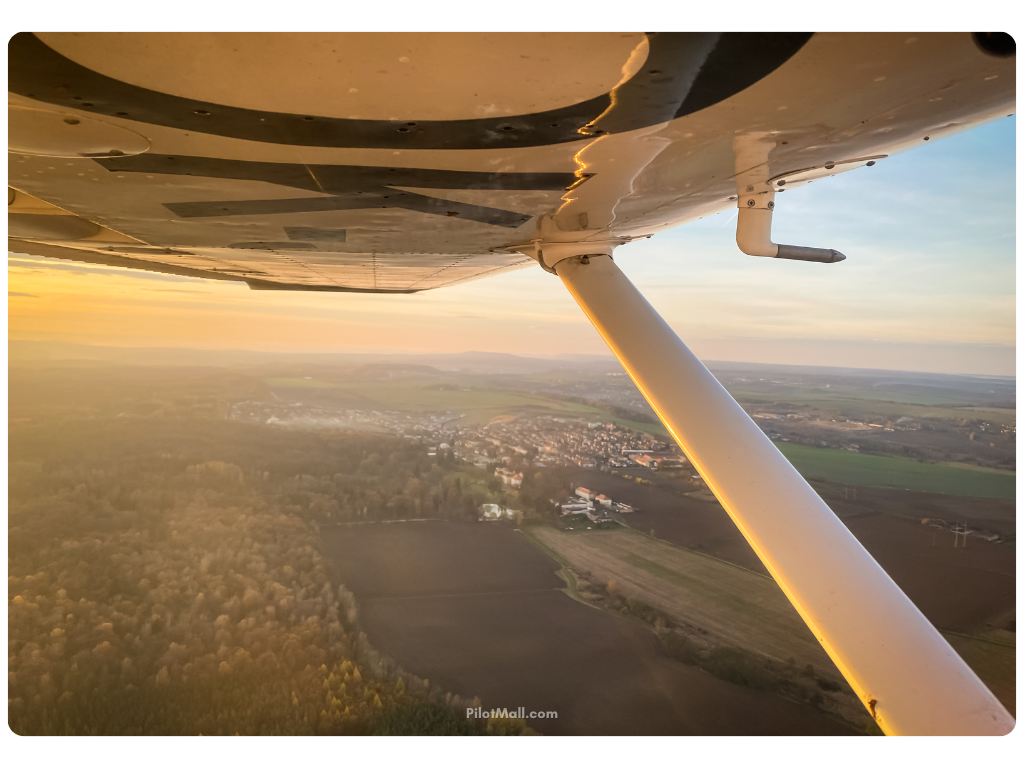
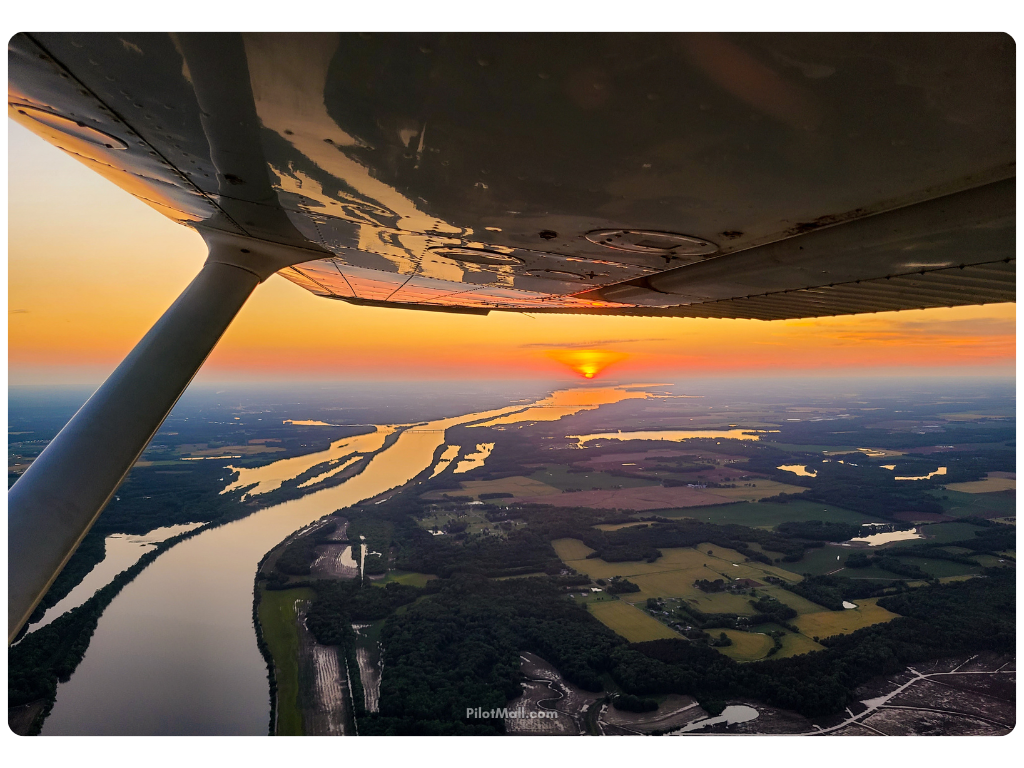
Ground reference maneuvers are usually flown at low altitudes between 600 and 1,000 feet AGL. Once you choose your maneuver altitude, you should stay within 100 feet of that initial altitude throughout the whole maneuver.
- Choose a low enough altitude that the ground reference point is easily visible, drift is easily discernable, and it’s easy to see changes in your turn radius relative to the reference point.
- Don’t be so low that your speed relative to the ground is too fast.
- Never be lower than 500 feet above the highest obstacle.
 How to Choose the Best Reference Point for Ground Reference Maneuvers
It’s easier to fly a successful maneuver if you’ve chosen the right type of point or points. Options will, of course, vary depending on where you’re flying, but best choices are objects that are easily visible from your maneuver altitude. When the maneuver involves more than one point, try to choose points that are similar in size and proportion if possible.
- Rectangular courses are easier to fly when they are bordered by straight line reference points like fence lines, irrigation water canals, or pipelines.
- Those same points are also perfect for S-Turns.
- A clearly defined feature like a water tower is a good choice for turns around a point.
 Commercial Pilot & CFI Ground Reference Maneuver (Bonus for Private Pilots)
Private pilots are only tested on the three ground reference maneuvers we already covered, but if you want to learn about a next level skill, stick around.
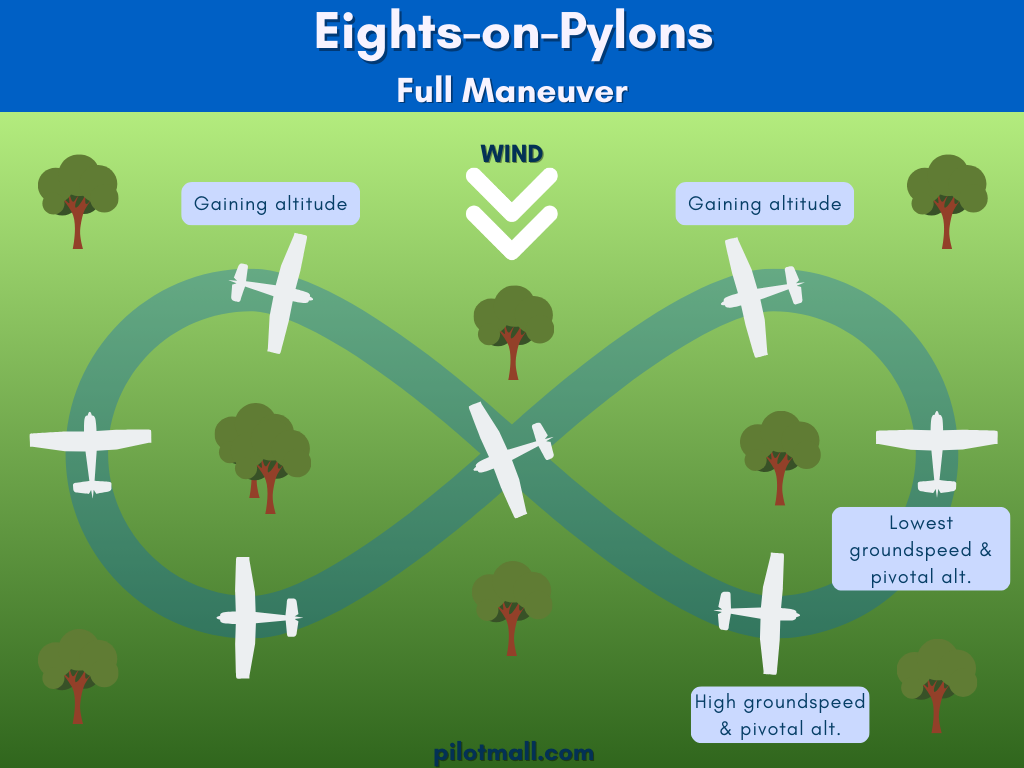
Commercial pilot and certified flight instructor candidates learn an advanced ground reference skill called eights-on-pylons. This maneuver takes the fundamental aircraft handling skills you learned from your private pilot ground reference maneuvers and builds on them.
Eights on pylons requires pivotal altitude calculations, an understanding of the relationship between groundspeed and pivotal altitude, plus the ability to adjust for shifts in the relative locations of your reference points and the pylons.
If you want to learn more about this maneuver, we covered it and its intermediary “eights around pylons” stepping stone skill in detail in our pivotal altitude explained post. Eights on pylons are also covered in the MzeroA Ground Reference Fundamentals Flight Training video.
Two Secrets to Acing Ground Reference Maneuvers
Finally, our best pro tips. If you remember and use these two keys, you will be flying near perfect ground reference maneuvers and be ready for your checkride.
- Groundspeed and bank angle are directly correlated. At faster groundspeeds you need a steeper bank angle. At slower groundspeeds you need a shallower bank angle. These bank angle adjustments for groundspeed are critical for maintaining a constant turn radius.
- Before you start your maneuver, visualize not only the ground reference point or points your maneuver will be based on, but also points in your flight path. As you fly the maneuver, use those flight path reference points to help confirm you’re on course.
Your next reads for building aircraft handling skills
- Understanding the Slow Flight Technique
- Maneuvering Speed: A Fully Comprehensive Guide
- The Chandelle Maneuver: What it is and Why You Should Learn to Fly it
- Ground Effect: Learning to Use it To Your Advantage
In addition to the blog posts linked above, review your copy of Gleim Private Pilot Flight Maneuvers for a thorough refresher of not only ground reference maneuvers but also other flight maneuvers pilots need to know.
It’s Your Turn
We’d love to hear from you. Student pilots: which ground reference maneuver are you finding most challenging to master? Certified pilots, when was the last time you practiced flying ground reference maneuvers? What advice do you have for new pilots who are just starting out?


